Monday, October 23, 2017

Wings of Love Mixed Media Canvas Featuring Creative Paperclay®

Hi Friends:  It's time for a new mixed media canvas featuring Creative Paperclay®!  I found this great wings mold at Michaels, paired it with a heart mold that I picked up on sale at JoAnns, along with my favorite Creative Paperclay® and a few metal pieces, and I created this Love Wings mini canvas.

Creative Paperclay® Love Wings Canvas


I really love using Creative Paperclay® with molds to create focal pieces on my mixed media canvases.  It's also great for adding texture and stamped images onto the background.

This project uses black gesso and lots of yummy mixed media products!


Please see my video tutorial for full instructions for this project:


Supply List:
Creative Paperclay® Modeling Material
Prima Marketing Art Alchemy Acrylic Paint, Opal Magic Aqua-Rose (Amazon)
Prima Marketing Art Alchemy Acrylic Paint, Opal Magic Yellow-Blue (Amazon)
PrimaMarketing Art Alchemy-Antique Brilliance Amethyst Magic (Amazon)
PrimaMarketing Art Alchemy-Metallique Wax-Vintage Gold (Amazon)
PrimaMarketing Art Alchemy-Opal Magic Wax - Royal Robes (SSS)
Prima Marketing Art Alchemy-Opal Magic Wax-Blue Velvet (Amazon)
Stampendous Glass Glitter (Amazon)
Studio 71 Black Gesso (JoAnn)
TimHoltz Ideology Quote Chips (Amazon)
Liquitex Professional Matte Gel Medium (Amazon)
Other:  Mini Canvas, beads, metal frame


I hope you enjoyed my project and learned some new ways to use Creative Paperclay® in your mixed media projects. Thank you so much for stopping by the blog today. Have a great, creative day! -Patti

Thursday, October 19, 2017

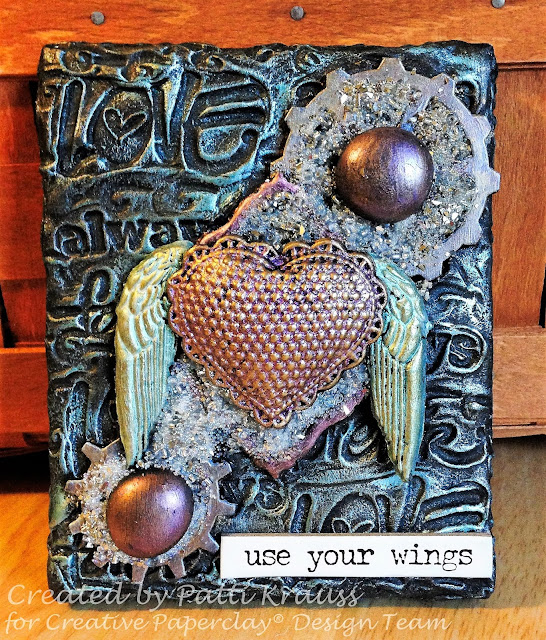
Scattered Gears Canvas

Hi Creative Paperclay® Fans! jenn here today to show you how I created my "Scattered Gears" canvas using all of the molded embellishments I create using both Creative Paperclay® and Delight® Air dry modeling materials.

I have done a few posts in the past showing how I create molded embellishments with these products. I like to make several and keep them on hand once they are dry.
Today I will show you how I used that stash of pieces and bits to create this amazing little canvas! In addition to the molded embellishments, I also used an array of wooden, chipboard, and metal gears and bits.
Supplies used:
Canvas
Black gesso
Mica Powders
Creative Paperclay® Modeling Material
Delight® air dry modeling compound

Start with a canvas coated with black gesso.
Choose all of your bits and pieces and coat them in black gesso as well.
Arrange pieces on your canvas and glue them all down using a matte gel or other adhesive. For this I used a combination of mica powders and ink sprays in hues of green, blue, and gold. Dry colors in between as you go.
For a nice finish use your finger or a brush and rub Gold wax or Metallic Lustre in raised areas for a nice pop!
Here a few close-ups that show detail and the molded pieces.


 I hope you have enjoyed this post and it inspires you to make something creative with your Creative Paperclay® products! All Creative Paperclay® products can be purchased online HERE. They are also available at your local Michaels, Hobby Lobby, and Joann's stores.
Thank You for viewing today!
Jenn


Tuesday, October 17, 2017

Creative Paperclay® Brush/Pen Holder ..... by Cindy Porter

Hi Creative Paperclay® fans, it's Cindy here, I am excited to share with you my latest project....
A Brush/Pen Holder

keep reading to see how to create your own...


Supplies:
water
silicone tools

Now onto a quick video demonstration .... enjoy


One last close up....


thank you for stopping by and joining me here today,


Till next time
Happy Creating
xC


Sunday, October 15, 2017

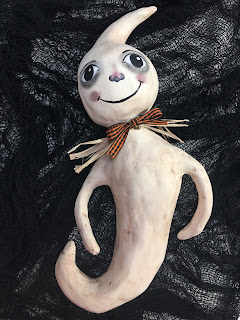
A Folk Art Halloween Ghost

Hello! Welcome to another Halloween tutorial! Today I will show you how to make this cute folk art ghost to add to your Halloween decor.


Halloween Ghost_1Halloween Ghost_2

The supplies you will need are as follows:

1 - 12” piece of wire
2 - 5” pieces of wire
Aluminium foil
Gesso
Acrylic paints
Craft wire approx. 12”
Raffia
Ribbon
Glue gun & sticks
Paint brushes
Sculpting tools
Water

You may follow along in the video below.


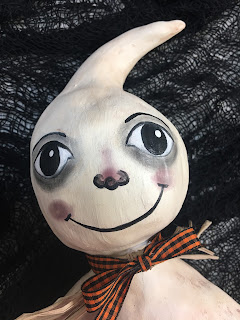
Here are some close-ups of the face should you need them for reference.

Halloween Ghost_3

Halloween Ghost_4

Halloween Ghost_5

Thanks for stopping by. Please share your work on our Facebook Page. I would love to see what you make. 

Happy Crafting!
Suzette

Blog: https://papermachepatch.com
Instagram: https://www.instagram.com/papermachepatch/


Friday, October 13, 2017

Revisitation with Creative Paperclay®

I was practicing doing pours on small masonite panels and then wondered how can I use these experiments. As a mixed media artist, nothing goes to waste. Creative Paperclay® to the rescue to create a new piece out of this piece.

SUPPLIES
Creative Paperclay®
Collage elements
Acrylic Paint
Stamp


I rolled out the clay on my surface, stamped into it and trimmed off the excess with an exacto knife. I placed my objects into the clay. These were taken off and the clay allowed to dry. This leaves marks in the clay that show me where to glue and place the elements later.


I painted it and glued in the collage elements. It is going to be a present to a friend's daughter. For years I have given art to my friends children or great grand children. Starting them on their "collection". One of them took a piece I gave her to collage and now to grad school.

Dream in Color!

Darlene Olivia McElroy


Monday, October 9, 2017

Kitty in the Window Canvas Featuring Creative Paperclay®

Hi Friends:  Do you love the image of a kitty in the window?  Here's a video tutorial that uses  Creative Paperclay® to make a cute kitten and window frame canvas.  I used a favorite ceramic kitten with Mold-N-Pour to make the kitten mold.  I used a Prima IOD mould and the Wilton Lace mold for the window frame, and a favorite butterfly mold for the butterflies.  I also used some favorite stencils, paints, and waxes to finish my canvas.  Here are some photos of the project - you can watch the video tutorial, below, for full instructions to create the canvas.


Here are some detail shots of the kitten and butterflies made with Creative Paperclay®


Please see my video tutorial for full instructions for this project:


Supply List:
Creative Paperclay® Modeling Material
Prima Marketing Art Alchemy-Opal Magic Wax-Vintage Silk (Amazon)
PrimaMarketing Art Alchemy - Metallique Wax - White Gold (SSS)
Prima Marketing Art Alchemy-Metallique Wax-Old Silver (Amazon)Prima Marketing Memory Hardware Artisan Powder - Vausseroux (Amazon)
Prima Marketing Memory Hardware Artisan Powder - Trianon Patina (Amazon)
Prima Marketing Memory Hardware Artisan Powder - La Chapeliere (Amazon)
Prima Marketing Art Alchemy-Sparks-Unicorn's Hair (Amazon)
Prima Marketing Art Alchemy-Sparks-Raven Black (Amazon)
Prima Marketing Art Alchemy-Sparks-Butterfly Spells (Amazon)
Prima IOD Moulds - Baroque No. 6 (Amazon)
PrimaMarketing Mini Art Stones (Amazon) 
Prima Marketing ART STONES (SSS)
Prima Finnabair Art Extravagance Texture Paste Clear Crackle (Amazon)
Wilton Fondant and Gum Paste Silicone Mold, Lace (Amazon)
Butterfly Mold (Amazon)
Liquitex Gesso - White (Amazon)
Liquitex Professional Matte Gel Medium (Amazon)
Beacon3-In-1 Advanced Craft Glue (Amazon)
Aleene's Fast Grab Tacky Glue (Amazon)
Tsukineko IRIDESCENT BLUE CREATIVE MEDIUM Texture Paste (SSS)
Wendy Vecchi White Embossing Paste (SSS)
Tim Holtz Idea-ology MELANGE Tissue Wrap Paper (SSS) 
Ranger Paint Dabbers, Pearl Metallic (Amazon)
Lindy's Stamp Gang Sprays (Amazon):  My Mojito Green, Blue Hawaiian Blue, Azure Sea Asters, Sea Mint Green
Heidi Swap Shine Stencil
Making Memories Scrapbook Colors - Blush
Making Memories Embossed Charms - Friends
Ranger Melt Art Mold-N-Pour
Other:  8X10 Canvas, cloud stencil, ribbon, bell

I hope you enjoyed my project and learned some new ways to use Creative Paperclay® in your mixed media canvas projects. Thank you so much for stopping by the blog today. Have a great, creative day! -Patti


Friday, October 6, 2017

October First Friday Fan Day


Need some inspiration for your next Creative Paperclay® project? Check out what folks are making with Creative Paperclay™.


Halloween Pumpkin Head Decorations
Whimsical Bird Sculptures
Owl Ornament
How to Transfer Images onto Paperclay

Fruit Bowls
Sculpting a Simple Flower

HELP US FIND YOU!!
  1. Use the hashtag #CreativePaperclay on all your social networks.
  2. When using Facebook, be sure the your posts and images using the #Creative Paperclay hashtag are set to public, otherwise we won't be able to find you.
  3. Share your projects on the Creative PaperClay® Facebook page.
I'm always trolling the web, looking for great Creative Paperclay® projects. If you find something, post it on our Facebook page.

GOT QUESTIONS???

Find the answers to your paperclay questions. See what other folks are creating. Stop by our Facebook group and say, "Hi!" Creative Paperclay Q&A
Carole

Tuesday, October 3, 2017

October's Tip - fixing cracks.... by Cindy Porter

Hi Creative Paperclay® fans, it's Cindy here, I am excited to share with you my tip for October... Did you know that you can easily fix ugly cracks if they occur in your projects??


Supplies:
water
silicone tools

Now onto a quick video demonstration .... enjoy


Thank you for stopping by and joining me here today,  I hope you found this helpful... Join me for my next post on how I created and completed the above piece...

Till next time 
Happy Creating 

xC


Sunday, October 1, 2017

How to Make a Creative Paperclay® Witches Hat Decoration for Halloween

Hello and welcome to another tutorial! Today I am going to show you how to make another Halloween decoration on your own using Creative Paperclay®.  I did lose some photos though as my SD card went bad 😞. I tried my very best to improvise so you could fully grasp each step. 😊Enjoy!

This week we are going to make a Witches Hat!


Supplies Needed :

Cardboard
Aluminium Foil
Masking Tape
Glue Gun
Creative Paperclay®.
Gesso
Acrylic Paints
Varnish
Raffia

Sculpting tools
Paint brushes
Water

Step 1

Cut a circle out of a piece of cardboard. This will be the base of your witches hat.


Step 2

Using aluminum foil build the shape of the top of witches hat.


Step 3

Cover the card board with masking tape. This will prevent the cardboard from absorbing moisture from the clay and warping.


Step 4

Cover armature with Creative Paperclay®, smooth and set aside to dry.


Step 5

Sand and fix any cracks.

Step 6

Apply a coat of gesso and set aside to dry.


Step 7

Paint with your favorite acrylic paints and set aside to dry.


I drew around my circles with charcoal to make them stand out.


Step 8

Varnish and set aside to dry. If you use the charcoal, you must use a spray varnish.


Step 9

Add embellishments if you like.


There you have it! Another homemade Halloween decoration. I hope you enjoyed this tutorial.


Thanks for stopping by!
Suzette

Blog: https://papermachepatch.com
Instagram: https://www.instagram.com/papermachepatch/