Friday, May 26, 2017

Dry into Wet with Creative Paperclay®

On this piece I am going to add previously made Creative Paperclay® heart that is totally dry into wet clay.

I start by marking in white the size of the heart.

SUPPLIES

Creative Paperclay®
Acrylic paint
Stamps
Holographic foil


After dampening the surface, I apply the clay and brayer it flat before trimming with an exacto knife.
When trimmed and the edges smoothed with some water on my fingers, I stamped the piece.


I wet the backside of the dry heart shape and press it into the wet clay. They adhere to each other beautifully. Next I painted it with red oxide acrylic paint and did a gold rub on top.


After painting it, I decided to apply some holographic foil to it. Now on to painting the rest of the art.

Dream in Color!

Darlene Olivia McElroy


Thursday, May 25, 2017

ImagiMeri's Creations Tips & Hints

Reconstituting Creative PaperClay


Did you know that when your clay dries out, whether by accident or as scrap pieces, you can still re-use it?  Stick around and read further for how.

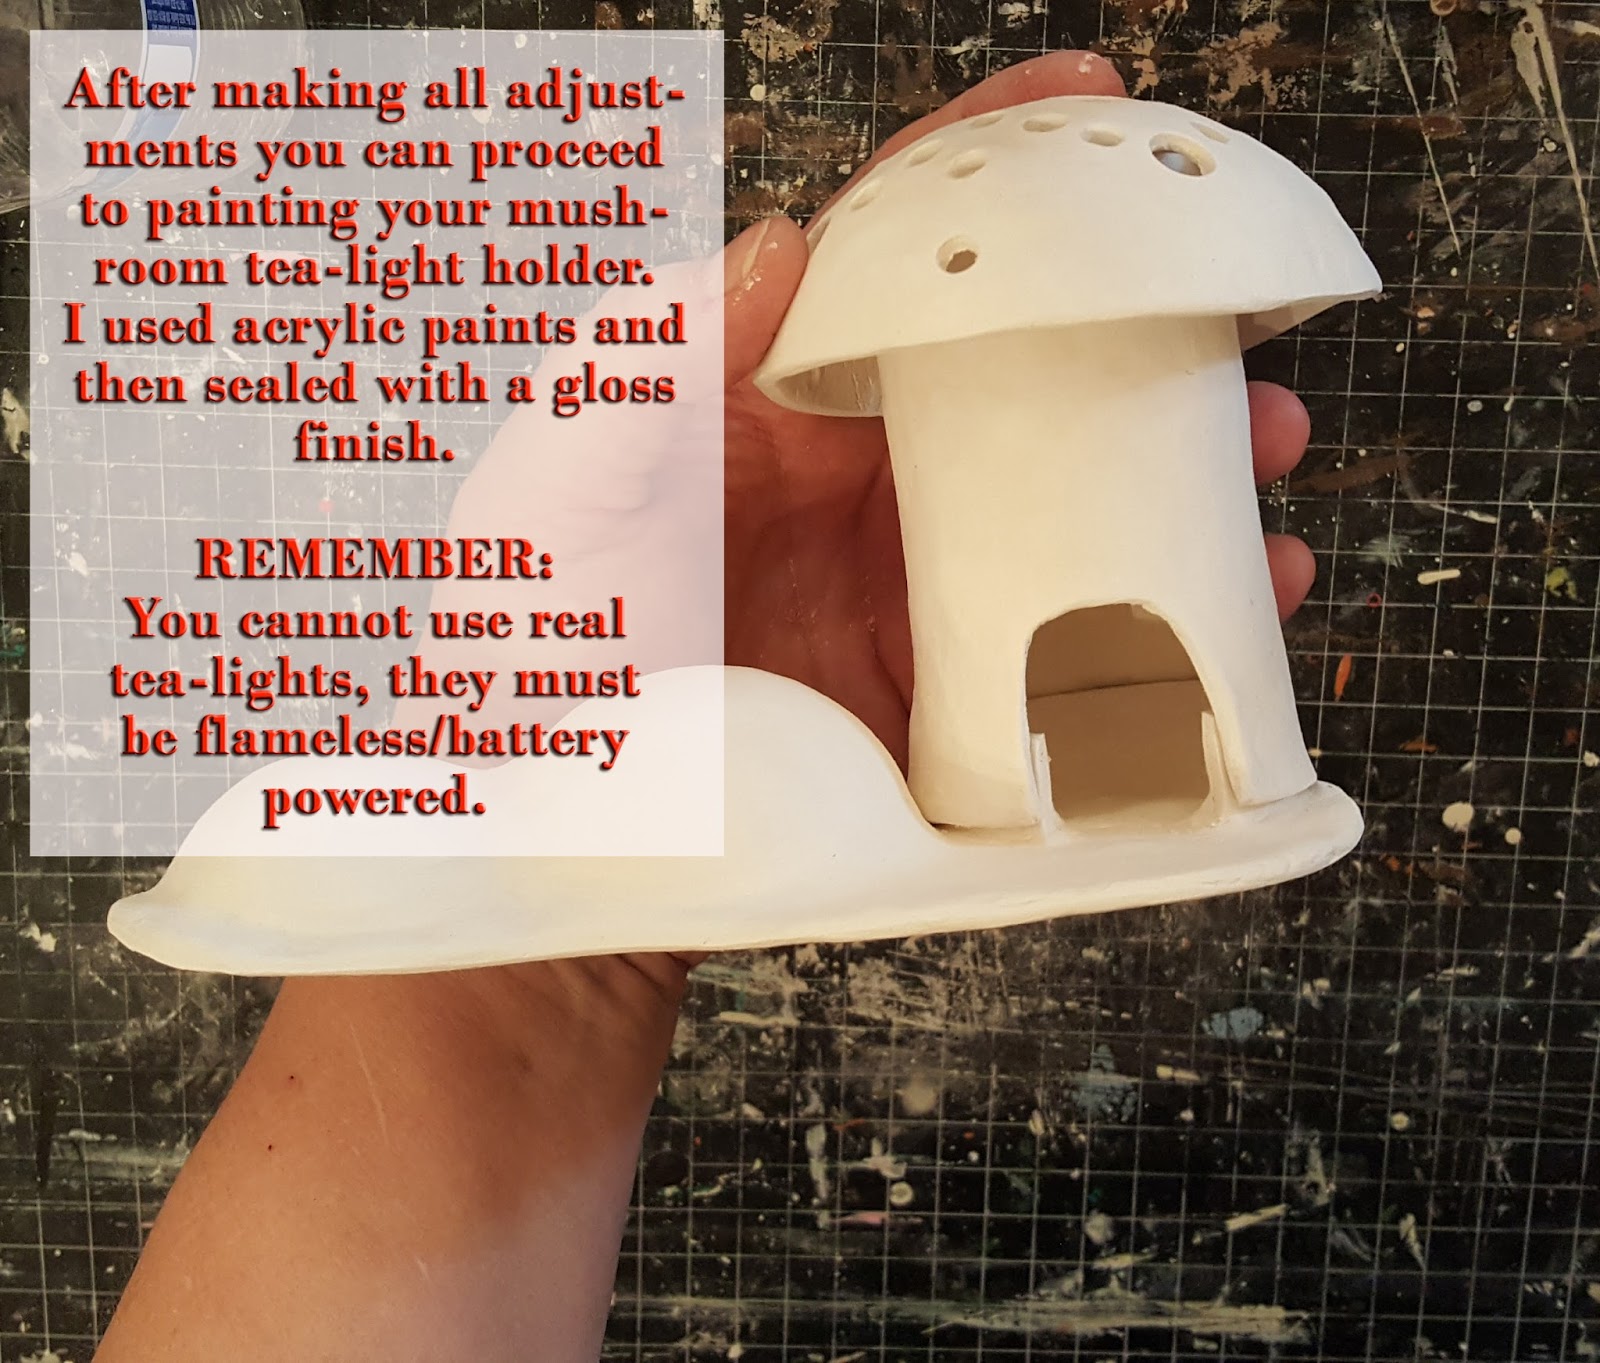
First, I'm announcing the winner of my "Mushroom Tea light" giveaway, it's Patti Strauss.....Yay, congratulations Patti.  Please contact me at meriw@cox.net with your address.


How to reconstitute Creative PaperClay:

I've been using Creative PaperClay since 2005, I can't even remember how I found it, or where I found it.  The point is.......I found it, and it's been a wonderful, creative journey ever since.

Some years ago, I was working on multiple projects.  My process of sculpting is to add clay over an armature of some sort, flesh out the general shape, let it dry and then start carving away.  I found myself with literally hundreds of "dried" clay bits everywhere.  After sweeping up piles and piles, and mourning the loss when I tossed the piles into the trash, I had an epiphany.  If you are able to rework the clay to such a degree by re-wetting the surface to adhere more clay, why not the leftover dried bits, too.  After much trial and error I finally got it, and I've been saving clay ever since.....yes, I'm a clay hero......snort, snort.  Fact: I know I'm not the only one to have discovered this, I just think it's worth mentioning again.

Step One:
Whatever the amount that you have cast off, left-over, etc., you must first break it down.


Step Two:
Once you've broken it down to manageable pieces, you must further reduce the size of the pieces.  The pieces must be as small as you can possibly get.  Now at this point, it really depends on what type of grinder you have available.  If you are a bulk user of Creative PaperClay you seriously might look into purchasing a Ninja type blender/grinder, with more than 1,000 amps, as you are most likely facing pounds of potential loss.  However, if you are the occasional dabbler with the clay, then purchasing a separate coffee grinder/food processor from Goodwill is your best bet.  This will be sufficient for your needs and when it wears out there's no guilt that you ruined your main usage appliance, and purchasing another is simple.


Step Three:
Depending on how much dried out clay you have, your best bet is to break the pile into small portions.  This keeps the escaping dust cloud down to a minimum and is less stress on your grinder.  Creative PaperClay is a non-toxic product, however, when performing this process it is safest to be wearing a particle mask.  This saves you from inhaling any of the dust that escapes. I found this little "KitchenAid" processor at Goodwill for about $4.  The plastic blade housing was a bit cracked, but still worked.  I knew it wouldn't last forever, but it got me through this batch for posting purposes.  Small coffee grinders tend to spin at a higher RPM and their soul purpose is grinding hard shelled coffee beans.  One of these would probably be your best bet.


Step Four:
Process your small batches using a pulse action for the first few grinds, then you can proceed to leaving it on grind till you see the pieces reduced to powder.  Depending on the size of your pieces, this process may take a few tries.  I guarantee that doing this process when you are left with lot's of dried out clay, will be worth these few steps.  Of course to prevent most of your clay from drying out, you should always keep it in an airtight, plastic baggy/ziplock, and be sure to mist with water occasionally if there are long periods of time in between usage of your clay.


Step Five:
Once you have your "powder" or even possibly your "powder with bits" you can then add water a bit at a time to bring the clay back to life, so to speak.  Now in the original form, Creative PaperClay is of a wonderful consistency, and smoothness because there are most likely additives that give it this property.  You will find that your reconstituted clay is of a lesser smooth consistency.  This will be due to particle size differences and that some of the additive/conditioner have been depleted/broken down during the drying out phase.  Your clay will still be perfectly fine for creating with, you'll just notice a difference in the consistency and texture of it.


I hope this has been helpful for you and less discouraging knowing that you are not throwing money in the garbage.  Although, on average a pound of the clay costs about $10, this might not be a concern to many, but it is to those of us on fixed incomes.  Have a lovely weekend.

I'll be back on Thursday, June 8th, with a fun 4th of July centerpiece tutorial.

Happy Creating!

Monday, May 22, 2017

Daydreaming Tag Featuring Creative Paperclay®

Hi Friends:  When using molds with your Creative Paperclay®, do you ever accidentally break pieces off the embellishment when removing it from the mold?  It happens to me more than I like, but I NEVER throw those pieces away.  Even if they're too intricate or broken to glue back together, the pieces can always be used in creative ways on your projects.

Here are some broken pieces from an IOD mould - it's a mess:


I used these pieces to create a mixed media tag that shows one way to use them to create a beautiful project and no one would ever know that the pieces weren't meant to go that way.

Creative Paperclay® Daydream Tag


Here's a quick video tutorial showing how I created the tag and used the broken pieces of that IOD mould:


Supply List:
Creative Paperclay® Modeling Material
Tim Holtz Layering Stencil - Flourish (Amazon)
Tim Holtz Idea-ology CRINKLE RIBBON (SSS)
Prima Marketing Art Alchemy-Metallique Wax-Vintage Gold (Amazon)
Prima Marketing Art Alchemy-Antique Brilliance-Fire Ruby (Amazon)
Prima Marketing Memory Hardware Artisan Powder - Mesdames Merlot (Amazon)
Prima Marketing Memory Hardware Artisan Powder - Vausseroux (Amazon)
Prima Marketing IOD Mould -  Baroque No.4 (Amazon) - broken pieces from this mold
Lindy's Stamp Gang Sprays (Amazon):  Poinsettia Red Gold, Burnt Umber
Manila Tag (SSS)
Petaloo - Botanica Collection Floral Embellishments - Vintage Velvet Minis - Ivory (Scrapbook.com)
Sculpey Flexible Push Mold, Art Doll Faces (Amazon)
Want 2 Scrap Pearls
Tim Holtz Edge Distresser (SSS)
Alene's Tacky Glue (Amazon)
Beacon 3-In-1 Advanced Craft Glue (Amazon)
Prima Epiphany Ephemera
Other items from my stash:  wire, charms, lace

Creative Paperclay® Tag

I hope you enjoyed my project tip and learned that your broken pieces can be used to create beautiful projects. Thank you so much for stopping by the blog today. Have a great, creative day! -Patti

Tuesday, May 16, 2017

Cindy's tip for May

Hi everyone, and welcome to the Creative Paperclay® blog.

It's my turn to share with you a tip or technique.... today I have chosen to share a quick tip....  this is something I came up with while trying to make sure I keep my paperclay in new condition after I have opened a new pack...

Being that I enjoy scrapbooking along with many other creative endeavours, I was searching around for the best way to store my opened Creative Paperclay® when I spied my Fuse tool.  For those unfamiliar with this tool, it was designed with the pocket page scrapper in mind, to seal off the small pockets on the multi pocket pages, a great little tool that I have found many fabulous uses for, and now I can add one more to that list - re-sealing my Creative Paperclay® packets.

So we begin with an open packet of paperclay.

next you need to push all the air out of the packet


Then you start to roll the Fuse tool (as close as possible to the clay) across the package.


Now I did learn that the Creative Paperclay® packaging requires more pressure and several runs across on both sides, but the Fuse tool did seal the package just like new, so my paperclay will stay as fresh as the day I first opened the pack.


I do hope this little tip is helpful and you can enjoy many good times with that new pack feeling right down to the last speck of your Creative Paperclay®.

You can get your Creative Paperclay® here.
and you can find the Fuse tool here.

Until next time, 
Happy Creating  


Sunday, May 14, 2017

Tip of the Month: Using Creative Paperclay® in Mixed Media

Creative Paperclay® is not only for sculpting. It can be used to create unique embellishments for your next mixed media project! Today, I will show you how to make some simple embellishments using Creative Paperclay® and decorate them. As a bonus, I will also show you how I incorporate them in a mixed media canvas!


For this mini tutorial you will need the following:

Creative Paperclay® Fish

Creative Paperclay®
Fudge sticks/craft sticks
Glue GunCreative Paper Clay®
Rolling pin
Sculpting tools
Cardboard cutouts of fish


Sand Paper
Gesso
Viva Decor CROCO Crackling Color Venice Blue (any crackle color will do)
Gold paint
Metallics Rub-On Paint Palette
Black acrylic paint
Water

Mixed Media Canvas

Book Papers
Gift wrap tissue
Spray Varnish (optional)

Let's get started!


Thank you for watching and please be sure to subscribe.  For more inspiration, come and visit me at www.papermachepatch.com.


Friday, May 12, 2017

Spooning with Creative Paperclay®

I am seeing art spoons in a lot of art shows so I decided to create one. For my inspiration I used Caroline Douglas's spoon. She is a friend and wonderful ceramic sculptor from Boulder, CO. These are great for decor and gifts. When I meet my friends for lunch we all have little baggies of art stuff to share. This would be great for the next time we get together.

SUPPLIES

Plastic spoon
Creative Paperclay®
Acrylic paint
Acrylic paint pens
Stamps

I was born with a plastic spoon in my mouth. Pete Townshend
Read more at: https://www.brainyquote.com/quotes/keywords/spoon.html
I was born with a plastic spoon in my mouth. Pete Townshend
Read more at: https://www.brainyquote.com/quotes/keywords/spoon.html

I was born with a plastic spoon in my mouth. Pete Townshend
Read more at: https://www.brainyquote.com/quotes/keywords/spoon.html


I covered the spoon with Creative Paperclay® then stamped it for texture. I cast the head with a silicone mold and added a cast butterfly that I had done at an earlier date. It is so easy to add dry clay objects into the wet clay.


With Caroline's piece on the left for color inspiration, I painted mine with acrylics and made the checkerboard pattern and dots with my paint pens. Definitely a fun piece to create.

Dream in color!

Darlene Olivia McElroy


Thursday, May 11, 2017

Mushroom Tea-light Tutorial and Giveaway!


By:
ImagiMeri's Creations

Hello Folks,
Meri Wiley here and I've got a cute tutorial for you.  I had every intention of filming this, but I'm sure none of you wanted to hear me coughing and sniffing from seasonal allergies which have just been horrible this year........right?

This tutorial will be in multiple pictures with progress steps written right on the images.  For further fun if you leave a comment, at the end of this post, you will be entered in a drawing to win one of the two mushroom tea-lights that I made for this post.

Please click on images to enlarge them for easier reading.

Warning:
Do not use live flame tea-lights!
Only use Flameless/battery operated ones.


Without further ado, here's the supply list:
1.  One 16 oz., package of Creative PaperClay
2.  Preferred cutting knife
3.  Straws in two different sizes
4.  4" plastic, 2-part ornament found at Hobby Lobby
5.  Half of a 1.5" styrofoam ball found at Hobby Lobby
6.  Half of a 1" styrofoam ball found at Hobby Lobby
7.  A rolling pin
8.  A piece of Saran Wrap for ornament half
9.  2" bottle of glue or tube for form
10. Clay extruder or garlic press if you want to add grass


RIGHT CLICK ON THIS IMAGE, SAVE AND PASTE TO
AN 8.5"x11" PAGE AND PRINT


If any cracks show up during the drying process
just make a paste of a small bit of
Creative PaperClay, kind of like spackle,
and fill in cracks.  Let dry again and then
proceed to the painting of your piece.


If you have any questions about any of the directions, or you have issues, please do not hesitate to contact me at meriw@cox.net and I'll be happy to help.

Please leave a comment, with your email included, below to win one of the mushroom tea-lights I made for this post.  I will choose a random winner and announce them on May 25th.  When a winner is chosen I will request an address and ship one mushroom tea-light holder and a battery powered tea-light to use with it.
Happy Creating