Thursday, May 31, 2012

Today’s Creative Paperclay® Tip:


I had a question about what I used to color the paperclay in the last project that I created. Here’s the tip: I used Primary Elements (pigment powders) from Luminarte. Paperclay tip 5-31-12 003

Paperclay tip 5-31-12 005

Since it’s a powder it blends easily with the paperclay plus you can wash it off your hands with soap and water. There are many colors to choose from which would make it very easy to use and then you don’t have to buy several different colors of another clay. Creative Paperclay® is a terrific product to work with!

Barbara

Monday, May 28, 2012

Having a little fun with Creative Paperclay®, Delight Clay!


I’ve been wanting to try doing some simple figures using Creative Paperclay, Delight Clay. Delight Clay is different than Creative Paperclay@ in that it’s whiter and it’s lighter. Delight Clay is also safe  for children to use and with Summer you may want to have some fun creative time with the children.  I started out by coloring the clay and dividing it into pieces for different parts of the rabbit that I decided to do.

5-28-12 paperclay1           5-28-12 paperclay2 I shaped and put pieces together until I had this:

5-28-12 Creative Paperclay 003                        5-28-12 Creative Paperclay 004  I then got busy with the other colored clay that I used adding features to the rabbit.

5-28-12 Creative Paperclay 006                     5-28-12 Creative Paperclay 005  How do you like my finished rabbit? I’m going to make some other animals too, now that I’ve got the hang of it, plus I’ve got a book on polymer clay people that I do believe I can use Delight Clay or Creative Paperclay® instead of now that I know how to color it. I just love this stuff! There are just soooo many ways to use it.  By using simple shapes, even children can get in on the act of creating with clay.

Barbara

Saturday, May 26, 2012

QUICK PAPER CLAY TIP WITH VIDEO

I LOVE Creative Paper Clay and the amount of things you can are endless with it. One thing I did this month was use it as a molding paste…..YES -You heard correct! I made a small video to show you how I did it. It works so wonderfully and I bet your mind will just start spinning with ideas with all the great tips this fantastic team has! Here is a quick video to show you!

Thursday, May 24, 2012

Annie Bella's Creative Paperclay(R) Tips #1


I am new to the world of Creative Paperclay(R) but I must say that I am in love.  It is one of the most versatile products I have ever worked with.  In my first project I made Recycled Beer Bottle Candleholders.  Part of the project was making a bunch of small embellishments with the paperclay.

When I made the embellishments I rolled out the clay and stamped images into it.  Then I cut them out with my X-Acto knife.  I found it was easier to do this on a small piece of cardboard with a slick surface, such as a cracker box, than to do it straight on my work area.  Working on the cardboard makes it easier because you can rotate the piece of cardboard when cutting out your stamped images and the slick surface and flexibility of the cardboard make it easier to lift the embellishments, which tend to stick when rolled out thin.

Tuesday, May 22, 2012

Capacity to heal and love/ Healing Art with Creative PaperClay

Dec 20 2011 we said goodbye to our dear Sasha , our hearts grieved for our dear friend who unconditionally loved my husband for 15 yrs and loved me for 11 yrs.
The days leading up to her death, we knew it was our last days together.
That was really hard.
So for my first art project on the Creative PaperClay Design Team I am posting something VERY simple.
Its a simple project that will continue to touch our hearts for years to come.


Take a ball of Creative PaperClay , flatten out into a circle, Mine is about 2inches , take your little furry friend paw and press into the PaperClay. EASY! I then washed Sasha's paw really well with warm water and doggie shampoo, as i don't fully know the properties of the PaperClay and wanted to make sure Sasha was safe.
See i told you it was going to be simple. <3

I can honestly say my husband and i love this imprint of our friend who so strongly left a huge imprint on our hearts.

And just because our hearts have the capacity to heal and to love again I want to formally introduce
Bella, our new puppy, only 10 days old and SO much a part of hearts already.


Art does not have to be complicated, it only has to come from the heart!

L. ANg

EDIT: While my husband and i did this as we knew Sasha was leaving us, you could do this much like new parents make an imprint of their childrens hands. It can come from a different place, one of celebrating life. Heart hugs to everyone. ANg

Saturday, May 19, 2012

Quick Tip - Rolling out Creative Paperclay®

Lyneen's Quick Tip of the Month!


When rolling out Creative Paperclay® it is important to keep the thickness of the clay consistent. To do this I use foam-core board.  I put two or three pieces together for the thickness I desire.

 
For instance on this hat it was important that all the pieces were a consistent thickness so the drying time wouldn't  vary on different parts of the hat. 

I roll out my Creative Paperclay® between the guides on transparencies on glass.  The glass gives me a smooth hard surface to work on.  The transparencies allow me to move one piece off the glass to dry and start another.  

Use a rolling pin dedicated to Creative Paperclay®

HAVE FUN CREATING!  


Thursday, May 17, 2012

Quick Tip - dried up clay?

Hi all here is a quick tip....
If your clay is all dried up in a very hard block.... (I mean completely hard for several months)
PLEASE DON'T throw it away!!!!!

draw a shape on it...


carve it carefully with a craft knife or similar
Then sand it with sand paper


decorate it as desired
This is a Pencil topper or in this case it protects a blade from digging into my hand when I want to find something on my desk.

I used Terri Sproul Mixers (steam punk set)
Stampin Up! Early Esspresso ink pad and sponge
Watch parts and 3D crystal Laquer.
and Fiskars craft drill to drill the hole in the bottom. (yes you can drill the stuff when it is dry! cool aye!)


Thanks for dropping by!
Debbie Buckland
http://artycrafty.wordpress.com

Tuesday, May 15, 2012

Edie's Tip 'o The Month

I have a quickie tip to share with you today :D
You know I love how versatile Creative Paperclay is right? You can sculpt it, you can shape it you can mold it, but did you know you can stamp it? It's true!
Creative Paperclay and the Delight air dry clay can both be rolled out and then stamped to create 3 D embellishments :D
I made this mushroom using this technique. I rolled my clay thin, then pressed my stamp into the clay and cut around the outline. Now all I will need to do is paint it when I am ready to use it :D
Visit MY BLOG for more tips and ideas.


Saturday, May 12, 2012

PAPER CLAY MOD CANVAS

I have had the best time using Creative PaperClay! I am a Mixed Media Artist and I love using different techniques and items in my art. In this project I put some paperclay in a baggie and watered it down very thinly to a paste consistency. Once I did that I just smooshed it around as if it were dough until it was the consistency I wanted. I spread on my blank canvas over a stencil i had to make an imprint and let dry. Here is a quick video from my youtube!
When it was dry (which took 24 hours) I then painted a mustard and bright yellow to get some different colors and textures.
I took my regular paper clay and rolled it out and cut out different circle sizes.


I painted them different colors and glued them on to canvas. I added dots from bottles of fabric paint as decoration and drew swirls on the background with glitter glue and more fabric paint. I then put 2 coats of 3D Crystal Lacquer on to seal it. It is Mod looking and I am so excited to hang on my wall!!


Thursday, May 10, 2012

Recycled Beer Bottle Candle Holder

Hi!!! I am Annie Bella.  I am so excited and grateful to be a part of the Design Team for this term.  I love Mixed Media and Recycled Crafts.  I am excited to show you how I integrate Creative Paperclay(R) into my work!

As I said above I love Recycled Crafts.  If I can find a use or a way to altar something that would normally go into the trash I will.  Another thing that I am absolutely in love with is blue glass.  When I came across some blue glass beer bottles I was immediately inspired.

This is what you will need for this project:

Recycled Beer Bottles
Something to cut your bottles with
Creative Paperclay(R)
A stamp of your choice
Alphabet Stamps
X-Acto Knife
A roller
Alcohol Inks and/or Craft Paints
A strong adhesive
and
A solvent such as Go Gone or Citrasolve

The first thing that you need to do is cut your bottles.  The top of the bottle will become the base for your candle holder.  You can use a bottle cutter to do this.  You can also find other methods online that work pretty well if you don't have access to a bottle cutter.  You also need to remove the labels.

Next you need to sand the edges of the pieces you have just cut.  They don't need to be perfect or even, you just need to make sure there are no sharp edges.


Now for the fun part, making the establishments with your Creative Paperclay(R)


Another way to decorate your embellishments is to paint them with craft paint.


Before you start to put together your candle holder, you need to clean it.  Use your solvent to get all of the stickies left behind from the labels.  After you get all of the stickies off wash the bottles with dish soap and warm water to remove the oils let behind from the solvent.


After your bottle is all cleaned up, put a good amount of your adhesive on the top of the bottle and place you bottom part of the bottle on top of it.

Use a bit of the same adhesive to adhere your embellishments to the bottle.


Just stick them randomly onto the bottle.  Make sure, if you did pieces to stick on the neck, that you pay attention to the curves as you go.

This is the final product.


Tuesday, May 8, 2012

Tuesday Tip by Angie

Creative PaperClay is such a fun product to work with! Its easy,fun, and  requires NO baking. It has minimal smell.
It reminds me of my childhood time, when Clay  was my best friend. Creative Paperclay takes it UP a notch ! Its fun for grownups and kids alike to play with. Release that inner child I say!

Let your heart and soul soar with some FUN!

So my tip........Keep a little spritizer bottle filled with WARM water in it. Paperclay does crack at times, what i found  helps is when you feel it drying out, give it a little spritz with warm water and work it into the clay. If it should crack, spritiz it and create something called "slip" (slip is a fancy name when the clay takes on a watery consistency.) Once the clay is a bit watery take your finger and smooth it out, creating a seamless look.

Drying times.......Let it dry slowly. It helps with the cracking. The process going from a moldable clay to a hard clay too quickly causes more cracks. The lucky thing...the cracks are easily fixed if they should happen.

Art on my friends,

ANg


Saturday, May 5, 2012

A Crown fit for a Princess!


I am so fascinated by Fascinators!!!  Since the Royal Couple are celebrating their first anniversary I thought it would be appropriate to create my own CROWN! This crown would be perfect for a "princess" party! ONLY IN PINK!
I took about a quarter of the Creative Paperclay® from the bag and worked it a little.  Then by hand I spread the clay out on transparencies.  Once it was pretty thin I used the rolling pin and shims to get a smooth surface on the Creative  Paperclay® to work on.  About an 1/8 of an inch. Making sure it is long enough for the pattern. 
The crown is pattern I cut measuring 11 inches in length.  Lay it on the Creative Paperclay® with a cutting tool carefully cut around the edge of the pattern.    
Randomly stamp the crown with swirls gently to give the crown some decorative dimension. This set of stamps are from Viva Las Vegastamps! Swirl Plate# 1333

With a little water create  slip on the two edges of the crown that need to be joined. Gently work the Paperclay® together at the seam. To help keep the round base I set a cup in the middle of the crown while it dried.  Let it dry overnight, up to 48 hours depending on humididty.

Mix Sakura Crystal Lacquer and Terri Sproul Mixers - Gold then paint the crown set aside to dry about a half an hour then give it a second layer!  While the lacquer is still wet lightly sprinkle with Terri Sprouls Gold Glitz Vintage Glass Particles.  Add a few Robins Nest Dew Drops and a large gem on the highest rise of the crown. 
You can see how small the crown is in my hand.  This will be attached to a headband ready for any "princess" to wear!

Thursday, May 3, 2012

Creating Bracelets with Paperclay


How to make a Creative Paperclay® bracelet

Hi all I’m baaaaack!!! I am so excited to be back for a second term!!!! Did you miss me? ;)
You may see something new in my posts in this six month term. I am working closely with Creative Paperclay® and Petra from Zigzag.co.nz to help promote sales here in New Zealand (NZ). Why not keep this great product international? It also helps our NZ customers knowing where to find it closer to home.  I love finding my favourite products here in my own country and my own town. (Also saves a bit on postage too, therefore helps me afford to buy more. ****shhhh*** don’t tell the hubby!)

I am going to start this term by showing you how to make your own bracelets by stamping, painting, crackling and drawing on them. So let’s go!
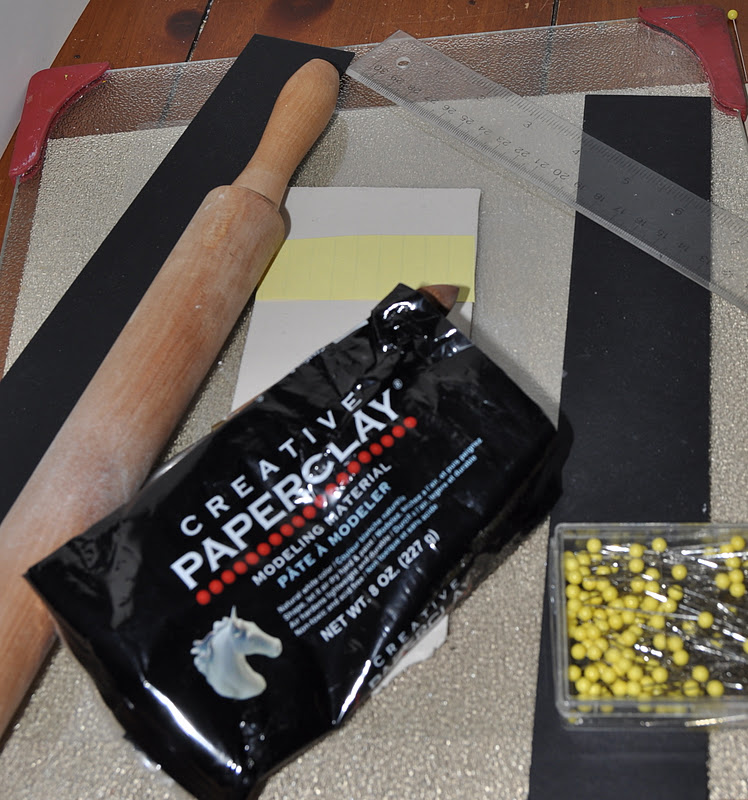
You will need:
·         A block of Creative Paperclay® - available in NZ from Zigzag.co.nz
·         Terri Sproul Mixers (TS Mixers) Purple, pink, blue set– available from VLVstamps
·         3D crystal Lacquer - available in NZ from Zigzag.co.nz
·         Artline  210 medium 0.6 black pen
·         Archival Ink Jet Black stamp pad
·         Inkadinado 97615 Clear stamps
·         One Step Crackle by Decoart
·         Atelier – burnt umber acrylic paint


Take some paperclay out of its packet and roll a long snake with it on your work space the length it would take to wrap around your wrist.

Take a round container that would fit your current bracelets and put the paperclay snake around it and flatten it. Let it dry.

When it was half dry I removed the paperclay bracelet and then let it dry completely.

I stamped one bracelet with a clear stamp and the other bracelet I drew lines on it with a marker pen.

With TS Mixers I mixed them with 3D crystal Lacquer and painted the bracelets

After the TS Mixers where dry I applied One step crackle to the face of the bracelets.
When that was dry I applied burnt umber acrylic paint (dark brown) over the bracelet and then wiped it off leaving it in the cracks only.
Thicker the application of One step crackle the bigger the cracks.

With the stamped bracelet I sanded the edge of the bracelet applied burnt umber acrylic paint to the spot that was sanded and then applied the One step crackle as above thinly to get finer cracks.

And I have some groovy new bracelets

These bracelets I made are a little flexible. I also made them with a small gap instead of a complete round. Thickness of my bracelets are about ¼ inch or 2-3millimeters.


Thanks so much for dropping by

I will be back later on in the month with a tip...