Thursday, March 29, 2012

Baby Duckies and Creative Paperclay Delight®


I have been having fun making little duckies today! I also created a small gift/memory box for a baby boy. I happen to have a great-grandson on the way and thought now would be a good time to start making things for him. Smile…… I started out with an ice cube mold that had lots of duckies and filled each one with Delight Clay.

Paperclay post 3-28-12 001

Pretty neat little duckies aren’t they? I covered several of the ducks with yellow paint and they really looked cute. I then took a paper mache’ box and decoupaged some tissue on it. Hmm, didn’t like the way it was looking so I pulled out the trusty Crystal Lacquer and Terri Sproul Mixers and painted the bottom with Aquamarine. The top of the box was painted around the outside with Extreme Glitter Paint and the top had a piece of scrapbooking paper decoupaged on it. I then used some letters to spell out “baby boy” and glued some of my ducks onto the top of the box. I love how it turned out! I think I’m going to use some of the other duckies in my Easter decorating!

Paperclay post 3-28-12 002    Paperclay post 3-28-12 008

Creative Paperclay and the Delight Clay are just so easy to use and they are so versatile. What do you think? Do ya think you need to get you some? Hmmm? I think so and give it a try.

barbara

Tuesday, March 27, 2012

Creative Paperclay Butterfly Tile


Using Creative Paperclay with rubber stamps lets you create very cool embellishments for your paper projects. I used a stamp from Hampton Arts to stamp into a slab of Creative Paperclay to make this tile. After it was dry, I covered the entire piece with black Distress Stain, to get into the details. In the recessed butterfly area, I used Wow Embossing Powder in Bay Area Blue (which is a transparent powder). This gave kind of an enameled look. Finally, I rubbed Viva Gold Decor over the raised areas.

Sunday, March 25, 2012

Mosiac Tiles


Happy weekend!  Today I have a card I created by making Mosaic tiles with paperclay.  I pressed a rolled sheet of paperclay in an embossing folder and then cut the squares/tiles out.  While it was drying I had it pressed in between two boards...this helped it not to warp during the drying process. 


Once the tiles were dry.  I painted them and once the paint was dried I rubbed the raised surface design with Inka Gold paste.  I think the tiles give the card a very dramatic feel. 

I hope you get a chance to create some this weekend.

Hugs,
Lori


Friday, March 23, 2012

Yooper Trolls™

By Amanda Marks

I have been making these since 1996 I can honestly say I haven't thought about them in 15 years.  I found an old box of slides and was going through them and found my Yooper Trolls™.  I decided to revisit them with Creative Paperclay®.

Step 1:  Tin foil Base
Step 2:  Cover in Clay
Step 3:  Add Eyes
Step 4:  Add Nose
Step 5: Add Mouth
Step 6:  Add Ears, Legs and Arms
Step 7:  Add Hands and Feet
Step 8:  Add Butt
Step 9:  Add Hair and Facial Hair with a Modified Needle Tool
Step 10:  Allow to Dry.  Paint and Add to a Base.


Wednesday, March 21, 2012

Creative Paperclay® Altoid Shrine!

I love altering things... especially small tins.  Molding with Creative Paperclay® gives endless options when it comes to what ever you want to include in a shrine. If you can't find something your want to include MAKE IT!  Frozen Charlottes are my favorite object to use when altering.  Here I have taken one of the dolls and used it in an ALTOIDS  TIN!
Using Creative Paperclay® I molded Frozen Charlottes in an Articus mold.  

Once the she was dry I sanded her down and painted her with Terri Sproul Mixers Citrine & Crystal Lacquer. Attached a small heart made with Creative Paperclay® with the lacquer. 
I gathered anything I thought I might like to use... I didn't use half of it. The background papers are from my stash.  The images are from Graphic 45 Olde Curiosity Shoppe
The tag on the front of the the tin has a light coating of lacquer.

 The bird is Creative Paperclay™ molded from a paper casting mold I found art my local thrift store.  I painted it with Terri Sproul Mixers Tanzanite Pearl & Crystal Lacquer.


Add a few oddities and you have your own little curiosity shoppe!!

thanks for Visiting Creative Paperclay®
If you have a chance come by and visit my blog!
Thanks Lyneen


Monday, March 19, 2012

Deployment Heart

My husband is in the Navy and he will be leaving on an eight month deployment next week. Anytime we will be separated because of my husbands job, my son and I each like to make little trinkets to remind him of our love and that we are waiting for him to return. For this project I wrote all of the things (wishes) I wanted for this deployment and hid them inside a Creative Paperclay® heart. This is a family friendly project that can easily be adapted for any occasion.


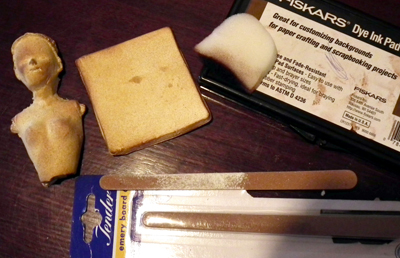
First, I rolled out my Creative Paperclay® and free cut two identical heart shapes, using the first as a guide to cut the second.


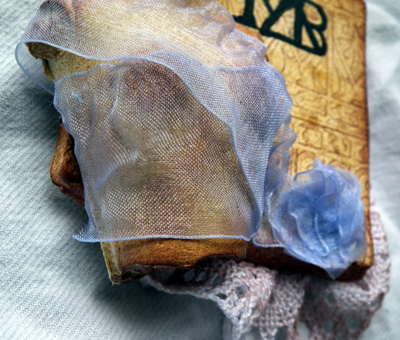
Next I wrote all of the things I wanted for him on a used teabag. You can use any soft, thin paper, but I like the soft texture of the teabags, plus they are readily available and they hold up well for writing. I only wrote one word for each wish, but each of those words has a much deeper meaning for me. For example I wrote “protection” and for me that means not only a safe deployment, but also protection from world events/ war/ danger/ illness/ and anything else he would need protection from. It helps to do a bit of free writing ahead of time to ensure you don’t forget any of your wishes. You can narrow your thoughts into one word associations before starting the project.


After I wrote all of my wishes on the teabag, I folded it up small enough to fit in between the two hearts.


I wet both of the hearts, placed the teabag in the middle and then pressed the hearts together, encasing the teabag,and then smoothed the seams. It is important to keep your hands moist while working with the clay to keep it from sticking. Add additional clay if needed to cover the seam or level out the heart.

If you want to be able to hang your trinket, poke a hole in the top before the Creative Paperclay® modeling material is dry. I don't normally sand my Creative Paperclay® projects, but I did sand this one just a bit to make it smooth.


Once my heart was completely dry, I painted it with a coat of black acrylic craft paint.


Next I painted the heart with Terri Sproul’s mixers. I added a bit of each of the Red Pearl and Gold Dust to the Crystal Lacquer.


I printed out a few of my words and distressed the paper with Distress Ink in Vintage Photo. I glued the words onto the heart with gel medium and added a string so it can be hung.


These little trinkets can be as simple or as elaborate as you like, plus they are an extremely family friendly project that can easily be adapted for any occasion. Make them for deploying family members, college students, newlyweds, or a birthday wish for a friend.

Visit my blog for more great ideas!

Saturday, March 10, 2012

Cake Box...

Hello Everyone, it's Robyn here today.  I'm so pleased to share a lovely, handmade cake box with you that I've made.  The box is made of sturdy card stock, but what I really would like to share is the lovely key embellishment that adorns the top.  I've made it using Creative Paperclay that I set in a mold by Articus Studio.


I painted it and then applied some Rub 'n Buff.  This is the same technique that I shared last month in my post if you'd like to refer back to the tutorial.  You can do so many things to create custom embellishments using Creative Paperclay.  The possibilities are truly endless.  I love this wonderful, non-toxic, bio-degradeable, all natural, air dry clay!

Wednesday, March 7, 2012

Shamrock Pick

Good morning friends and fellow crafters,


I am here to show you a quick (not quite done) project that I am making for work.  I've been commissioned by work to create some giveaways for St. Patty's Day and I am so excited about it.  I made something similar for Valentine's day and was asked to do it again for St. Patty's Day.  I love creating projects, especially for a purpose.  Now the opening sentence said "not quite done", but in fact the project is done, but I cannot show it all right now because there are going to be a few different posts for this project.  Which in turn means, you will have to keep checking back to see the entire finished project.


I started with rolling my Creative Paperclay® out between two skewers for an even thickness.  Then I cut the shamrocks out with a cookie cutter I got at Michael's for 99 cents.  I love a bargain.
Then I placed the skewers on the clay and pressed them into the clay and used white glue to attach them
and let them dry for 24 hours.
After all the shamrocks were dried, I cut the little stems out of the clay
and covered the skewers.
and sanded it after that dried completely.
Then I painted them green and used my stickles to outline them.
Now remember, there is more to this project, so if you are interested in the next phase you might want to come and check out my blog for future updates here.

Monday, March 5, 2012

Greek Inspiration with Creative Paperclay®

Hello all...
I have always been inspired by Ancient Greek art and design. Its fabulous and I could research it for hours!
Well thanks to the internet and Google images search I have looked and looked up Ancient Greek art and design.... Sculpture... Symbolism and colourings.

This is what I ended up with....


Here is how I made it
I used:
  1. Creative Paperclay®
  2. square plastic packaging from a cuttlebug die
  3. old barbie/fashion doll (the hair I cut off as it was matted - i am planning to re-hair her oneday)
  4. Amaizing mold putty - parts 1 and 2
  5. Inks/paints/brushes/ribbons etc to decorate
  6. Glue Gun
I molded the old barbie/fashion doll
Made one of full torso and then a head and a nose. I will only use the full torso for this project today...
When the clay was partly dry I popped it carefully out of the mold then shaped the face a bit by pinching the cheeks in to make the shape of the face I wanted. I also tore off the shoulder parts and the waist part to make it look like broken stone..... then let the clay dry for 3 days till totally hard.


Next I put some clay into the cuttlebug die packaging and molded a flat-ish square:

let dry for 3 days with the doll torso.


This is when I started really researching my design..... what did Ancient Greek wall sculpture look like?What colour was it? What colours did they use back then? What symbols did they use? What did the Greek alphabet look like?


Well after all that I came up with a loose design.


I also took the symbols of the Greek Alphabet in the form of my Initials DMB and got "Delta Mew Bay-tah".... so cool.  I think I'll start up a Crafting Sorority called that... what you think? LOL
As you see I was playing around with the logo design too.... The stamp is from Viva Las Vagas stamps

Decorative Frieze


 Spray with Pale Ale memories mists from Stewart Superior

 Tidy the edges and then ink with brown.


 Stamp your image on the panel piece then glue your ribbon around the torso and glue the torso to the panel


Next with a pencil draw your Greek Logo and then paint it.


Now find some old looking lace, ink it up and glue it to the back of your art....
I like naming and signing the back or bottom of my work....
 
You are finished!
 
 Delta Mew Beta...... lets go and create ya! LOL

 And here it is in my space.
Thanks for dropping by.